2016年6月8日星期三

Detailing Drawings and Option xN Project 2

Internship Life Part 7 

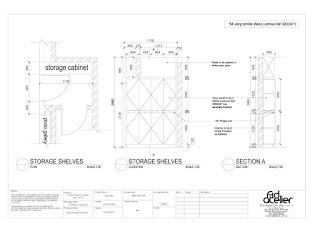
After the options had settle down. my next assignment is to draw all the cabinets and shelf detailing drawings for the contractor to proceed to the next stage so they can start renovation, prepare the materials, order and build.

Before show you the detailing drawing, here are the furniture layout plan for the Casa Green Unit.


Furniture Layout Plan

The cabinets and shelf detailing drawing in living room area.
The shoes cabinet detailing drawing.
The TV Console detailing drawing.

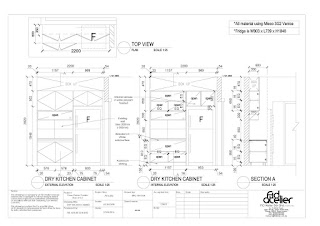
The cabinets and shelf detailing drawing in kitchen area.
The Wet Kitchen Cabinet .
The Dry Kitchen Cabinet elevation.
The Wet Kitchen Cabinet elevation A.
The Wet Kitchen Cabinet elevation B.


The cabinets and shelf detailing drawing in Master Bedroom area.
The Master Bedroom Cabinet elevation A.
The Master Bedroom Cabinet elevation B.
The Storage Cabinet elevation which locate in front the master bedroom door.

The cabinets detailing drawing in Bedroom 2 area.
The wardrobe cabinet elevation in Bedroom 2.

The conclusion of this project is normally designer will build a 3D perspective view according the existing furniture layout plan and show to the clients. For the detailing drawings, persons who in charge will have to research all the mtl that what designers had use, discuss with them, research the price and record in description clearly and the dimension of  the cabinets every wood and space divide must be accurate because when the contractors going to build or move they need to have a accurate figure to do all.


Detailing Drawing and Option xN Project 1

Internship life Part 6

Today my mission is to draw  some detail drawing of a new Casa Green Unit and the clients wanna see some more other design options about the TV console because he wanna save some budget but he wanna kinda remain a bit the design that we show him. (okay..!><)


First,here are some 5 design options(suggestion) that i had change for him
Option 1
Option 2
Option 3
Option 4
Option 5

Finally he's cool with my option 4 but he wish i can change another laminate colour for him and i choose a darker one for him. *suppose there is a island and a dry kitchen area at the air-cond wall there but he choose to change all and replace with altar.* 

After he choose for the design of the TV console, im ask to draw the detail drawing for the contractors so they can start build for the clients.


Build the 3D Project 2

Internship Life Part 5

Next,I'm going to continue my Setia Putra Show Gallery Type B. 

Here are the Type B show unit 3D perspective view.

 
This is the Living Dining area for Type B show unit. The different of two type Living Dining area is type B is much more lighter than the space in Type A and didn't divide the dining and living area that obvious like Type A.
This is Type B wet kitchen area. The line design on the cabinet is me first time learn how to use Proboolean to edit and this all thanks to my supervisor =) The hexagon tiles are from our supplier Feruni. 
For the kid room using single bunk bed design again but upstair can use as spare bed too. A cabinet and book shelf was design under the bed beside the working desk.
The last space for this Type B show unit that i had design is the master bedroom. A special concept of the bed head and the cement style (industry concept). 

From this project I felt the important of how a designer to inspired a design from the mood board specially it is from the clients. Show unit are very important for the first sight and I'm very satisfy with my design. (although this project still pending.....)

Built the 3D Project

Internship Life Part 4

This time my mission is build the 3D view using 3Dmax with existing furniture layout plan.. 

This project is Setia Putra Show Gallery which had Type A and Type B. Im in charge in doing Type A Living Dining area and Master Bedroom. And Type B Living room, Master bedroom, kid room and kitchen area. 

According to the mood board that Clients suggested, i had done my 3D perspective view successfully in one week time. 

Here are the Type A show unit 3D perspective View.

This is the Type A unit Master Bedroom with a clear tempered glass with some sticker design on it to seperate the working space and sleeping area. With a full height cabinet behind the working space area.


This is the Type A Living Dining area. I had design two different Tv console for my client and at last they had chosen the grey cement design because they feel it more match with the ceiling and *cheaper.


100 Series Plan Project

Internship Life Part 3

During Uni time, the course that drawing all this detail drawing we call it working drawing but our lecturers mostly are Architect so our interior detail drawing mostly din't get the chance to know more. 

This time, my supervisor who in charge ING Auntie Anne's Setia City Mall gave me a chance to help him draw 100 series plan.. (okay!i had to admit i don't have any idea what is 100 series plan during the time.)

He explain to me 100 series plan is a meaning that the detail drawing start from code 100 are calling 100 series. 
100 : Furniture Layout Plan             101 : M&E Plan               102 : RCP Plan 
103 : LP Plan                                        104 : ACP Plan                105 : SP Plan 
106 : FFP Plan                                     107 : Pipe Route Plan 
Before one of my assignment in UNI is design a kiosk but for the first time I actually learn drawing all this 100 series plan for a kiosk. And to success all this 100 series plan, I was taught by my supervisor to research the site photo and the info from the clients to draw. 

101 : M&E Plan. This plan explain the plugs and the switch where and function and also the length of concealed lights and the T5 lights.
102 : RCP Plan. This plan explain the location of all the things that located on the ceiling like AC, AP, Sprinklers, EL, and others. I had to relocated some other for new design of the kiosk to avoid each other crush on it.
104 : Air Cond Plan. This plan i also relocated the position too due to my supervisor new deisgn. This plan only got 2 main things. I. Supply Air Grille and II. Return Air Girlle. 
(there's no 103 because my supervisor said RCP already got it.)
105 : Sprinkler Point Plan. This plan din't really change anything because due to safety issue of the mall we only can move slightly to confirm all the points can split the water around the circle(red dotted line)


107 : Floor Finish Plan. This plan is showing the arrangement of the tiles in the kiosk.
108 : Pipe Route Plan. This plan is more complicated then other because this plan had to relocated everything because we can't change the location of the water source and have to pass by water meter and hot cold water supply to all the equipment. After discuss with the supervisor and the contractors we finally have some conclusion about how to design the water flowing route.

Conclusion for this project is I'm so enjoy about this drawing this 100 series plan because i kinda learn a lot working drawing information and knowledge. It's very special experience when I joined the discussion with my supervisor and the contractor about how to design the water flowing route and other too. 

Design a Condo Project Part B

Internship Life Part 2

 Continue, is the 2 daughters room.

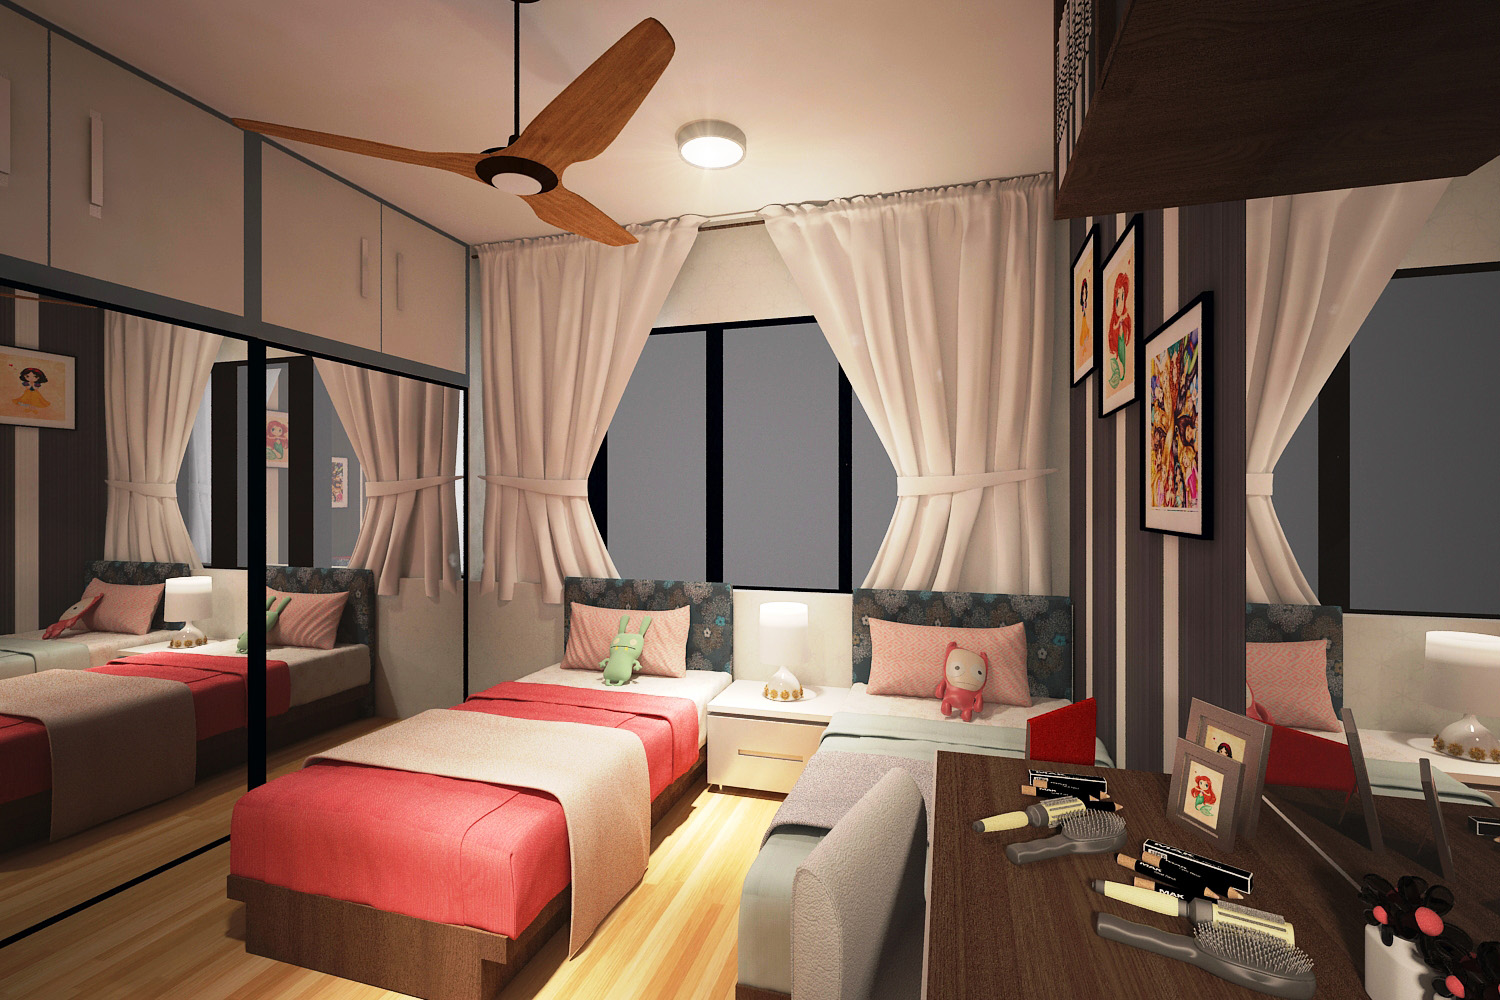
Two single beds with a side table lamp in between to keep some privacy for them at the same not that far.
A wall hang with drawings and a dresser with a horizontal mirror with a flower design wall light. A wall cabinet for them to put some toys or books on top.
A single bunk bed which design a personal space on bottom who can let him enjoy some reading or gaming session.
A working desk facing a cement style world map wall paper and a sliding mirror door cabinet beside the bed.

The last space is Master Bedroom.
at the entrance to master bedroom toilet, two sides had a full height cabinets as the dressing area. A timber box up design from the wall behind the bed to the ceiling and continue to the TV wall.
 

Conclusion, first project was designing a Condo kinda challenge for me because I'm not so familiar about company design and with a "imagination family" but luckily we all finish our design a Condo Project in one month *before the deadline* (clap clap) even do a project slideshow with material board and mood board also. 

*proud* XP

Design a Condo Project Part A

Internship Life Part 1..

Boss came to me, Rax and Shook Fun and said.." Guys, i have two Casa Green Condo Type B to design and one Casa Green Condo Type A.. You three can choose yourselves and design according the mood you guys like but must realistic hor.! And... please done it in one month!" *OMG*

I have done all my project so I got the chance to choose which one I like and with some "imagination family" I have decide to choose Casa Green Condo B to design..

"Imagination Family" List : Parents, 2 daughters and a son. (5 persons) 

First, we had to design a furniture layout plan first and pass my boss stage...and after some concept and explanation and discussion with boss.. I had pass my furniture layout plan in 1 week! *Oh Yeah!!*


Boss want us to design master bedroom, living and dining area, TV Room, bedroom 2 and bedroom 3.

The Dining Area with a Wine rak and some dry kitchen cabinet on the side.
A shoes cabinet with a full length mirror when you entry from the entrance.
A marble style wallpaper and the background of the TV and a TV cabinet on the side with mirror background to make the living room space look wider and bigger.
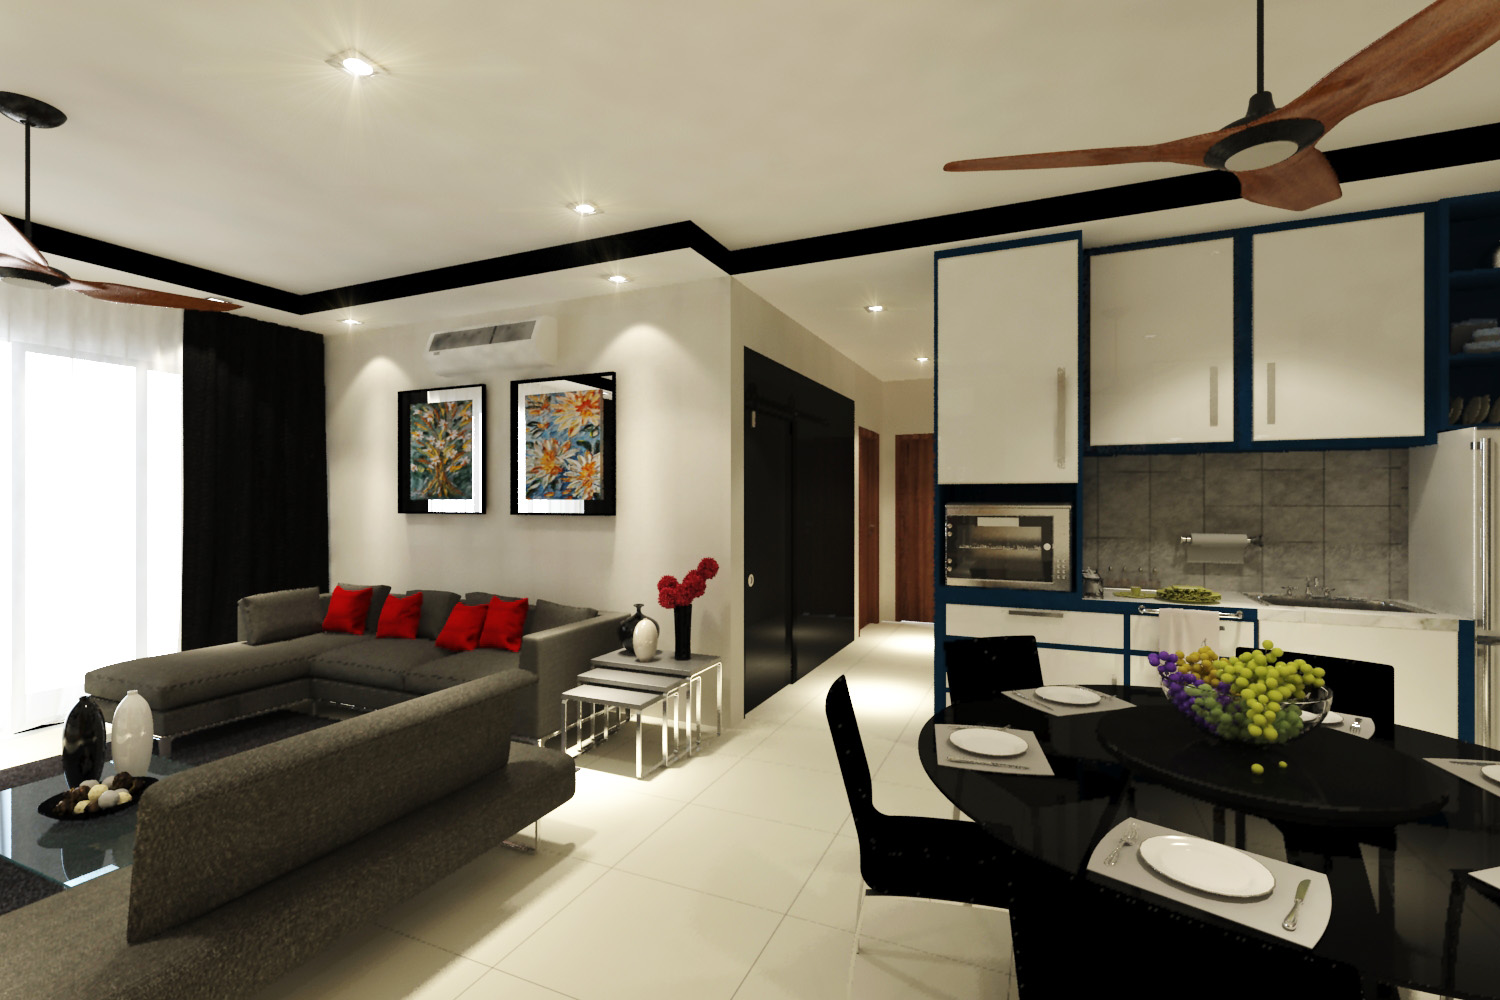
The full view of the living and dining area with the hallway to the rooms.